Now that you are all set, we suggest you have a look at these key features that will help boost your productivity. Here are AceProject’s main features.
Time Sheet Module
With this module, users fill out their time sheets manually by selecting a project, a task, a time type and typing the number of hours worked.
A time sheet can be filled out manually as follows:
- Go to Home => Time > My Time. AceProject will then display your current week and all existing time items therein.
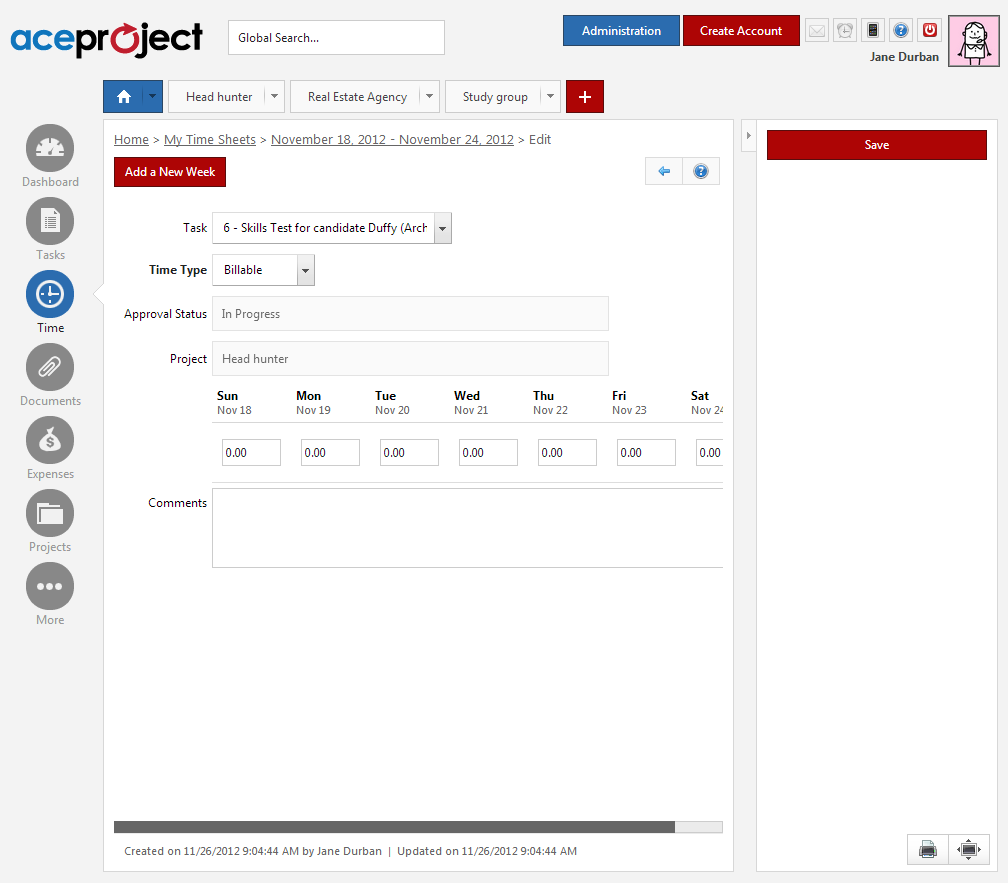
- If you wish to edit an existing time item, add time directly in one of the time boxes or click its “Status” link to enter Edit mode. If you wish to add a new time item to your current week, click on the “Add time to this project” button and select a project. You may also use the navigation tools to edit or add time items in other weekly timesheets.
- When creating a new item or updating an existing item in the Edit screen, select the appropriate time type and enter your hours for each day of the week. You may also type in comments if you need to describe the work done or provide any relevant information. Click “Update” or “Save” when you are done.
Time Approval
Once your time sheet is filled, it can be sent to a project manager for approval.
Here’s how you do this:
- Select Home => Time > My Time.
- Navigate to the weekly timesheet which contains the time items you want to submit for approval.
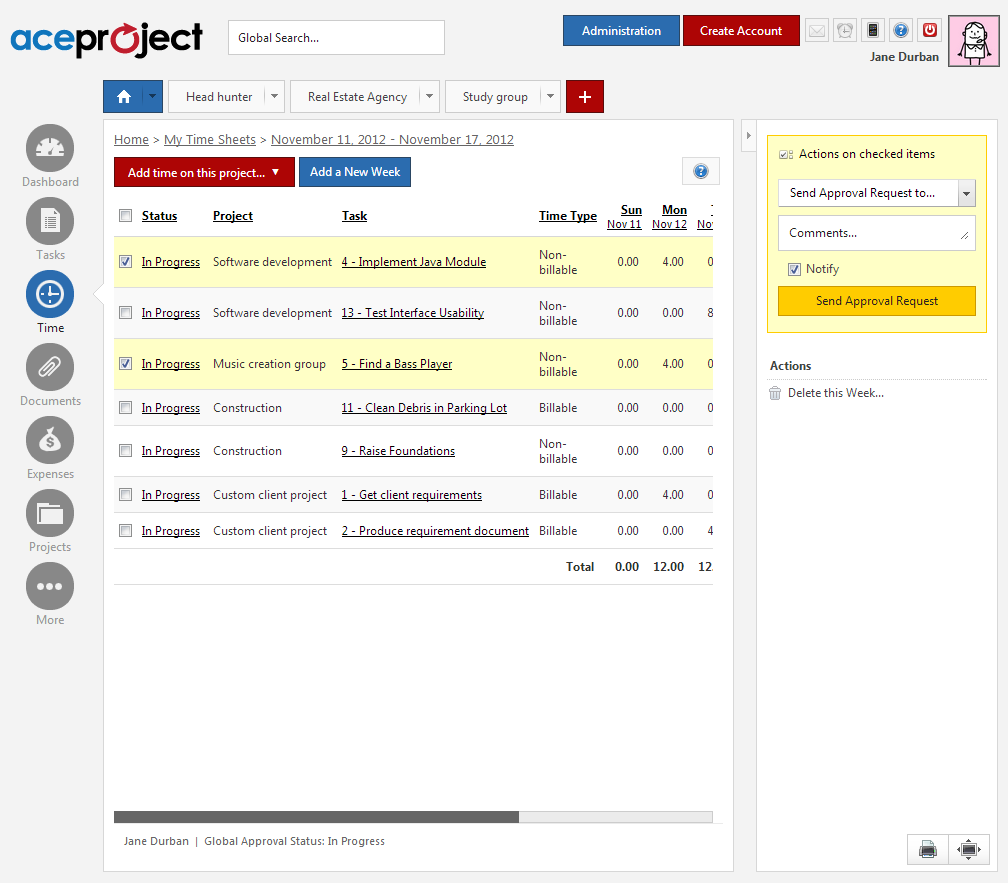
- Use the checkboxes to select the time items you want to submit for approval.
- In the right pane, in the “Actions on checked items” area, select the user to submit your time items to in the “Send Approval Request to” drop-down.
- Type in a custom message in the “Comments…” box, if needed.
- Click “Send Approval Request” to submit your time sheet for approval.
Time Clock Module
This module records the time you spend on a task automatically. All you need to do is start the time clock when you start working on a task, and close it when you are finished.
Here’s one way to use the Time Clock module:
- Click on the Alarm Clock icon near the upper right-hand corner of the screen, (alternative procedure: open a task from any task list by clicking its Summary link and click on the “Start Time Clock” option located in the right pane).
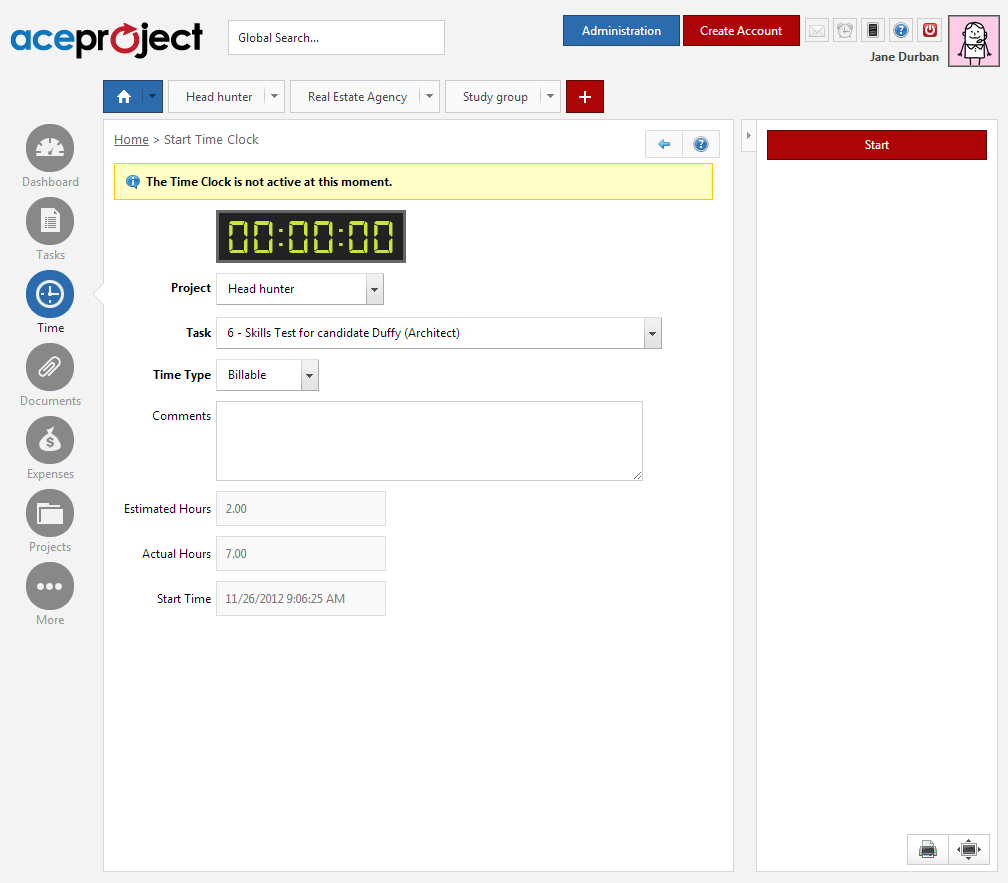
- Select the project and task you are working on and a Time Type.
- Click the “Start” button to start the time clock.
- To stop the timeclock, click once again on the Alarm Clock icon near the upper right-hand corner of the screen.
- Apply any necessary changes (such as adding a comment) and click the “Stop” button when you are done. The “Start” and “End” times as well as the elapsed hours are automatically recorded in your current weekly timesheet.
Time Reports
These reports display all time items you entered using the “Time Sheet” and the “Time Clock” modules. All users can generate their personal time reports under the Home tab. Depending on your access rights, you may also be able to report on other users’ time under the Home tab and Project tabs.
Here’s the procedure to generate a cross-project time report:
- Go to Home => Time > Time Reports
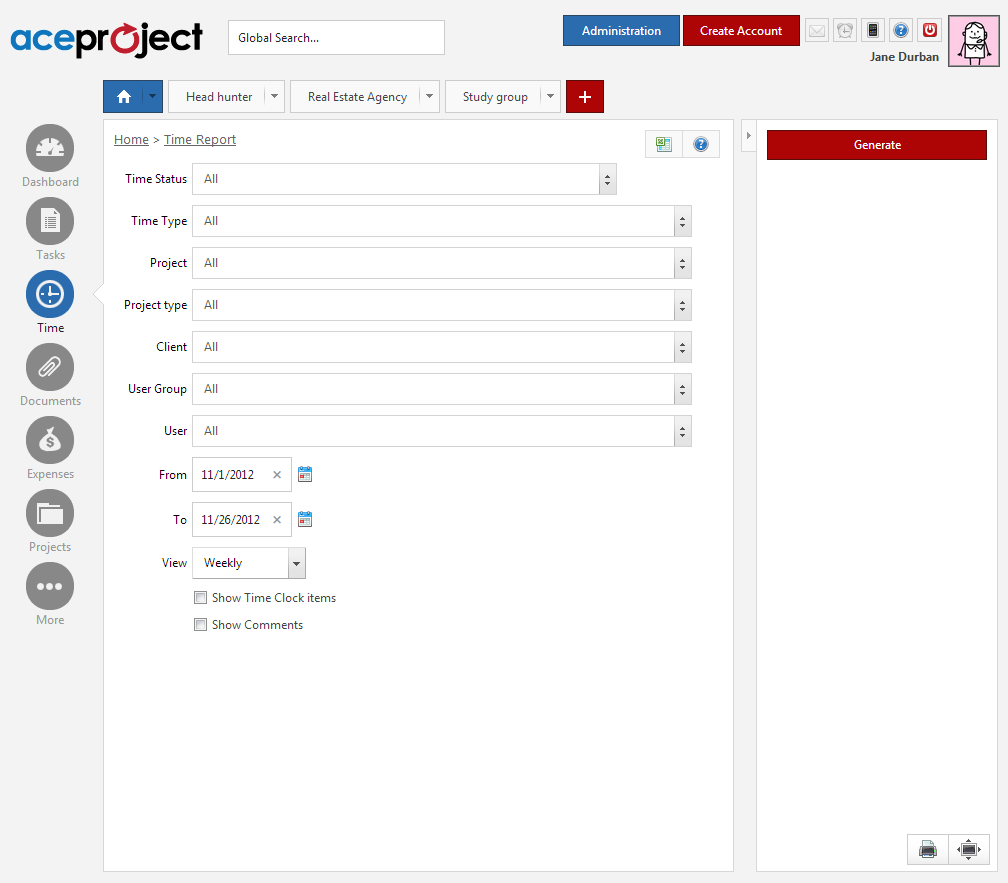
- In the “View” section, specify how time items are to be presented in the time report. AceProject supports a two-tier breakdown.
- If you do not want to see time items listed in the time report but would rather simply see totals per breakdown, check “Show only totals and subtotals”.
- In the “Fields to Display” section, specify the columns you want to see in your time report, their order from left to right on screen (which is the same as the order of appearance of fields, from top to bottom, in the “Fields to display” box), as well as the sorting order of time items within a breakdown.
- In the “Filters” section, specify a date range and configure your filtering in accordance with your needs.
- Click the “Generate” button in the right pane to view your report results.
Discussion Forum
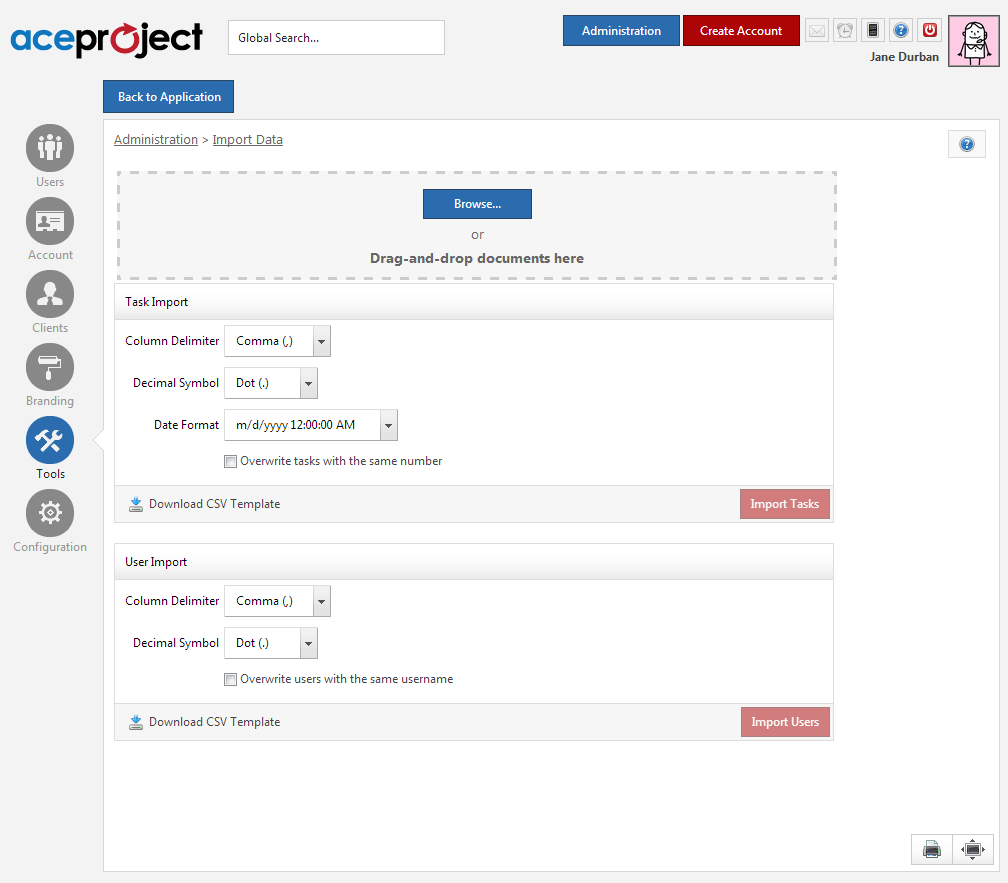
A discussion forum is available for each project. All users with the “Can Open this Project” access right can access this feature under Project Tab => More > Forum. It is quite useful for posting issues, for providing assigned users with additional help, for sharing ideas or simply for communicating with other users about the ongoing project.
Mailbox
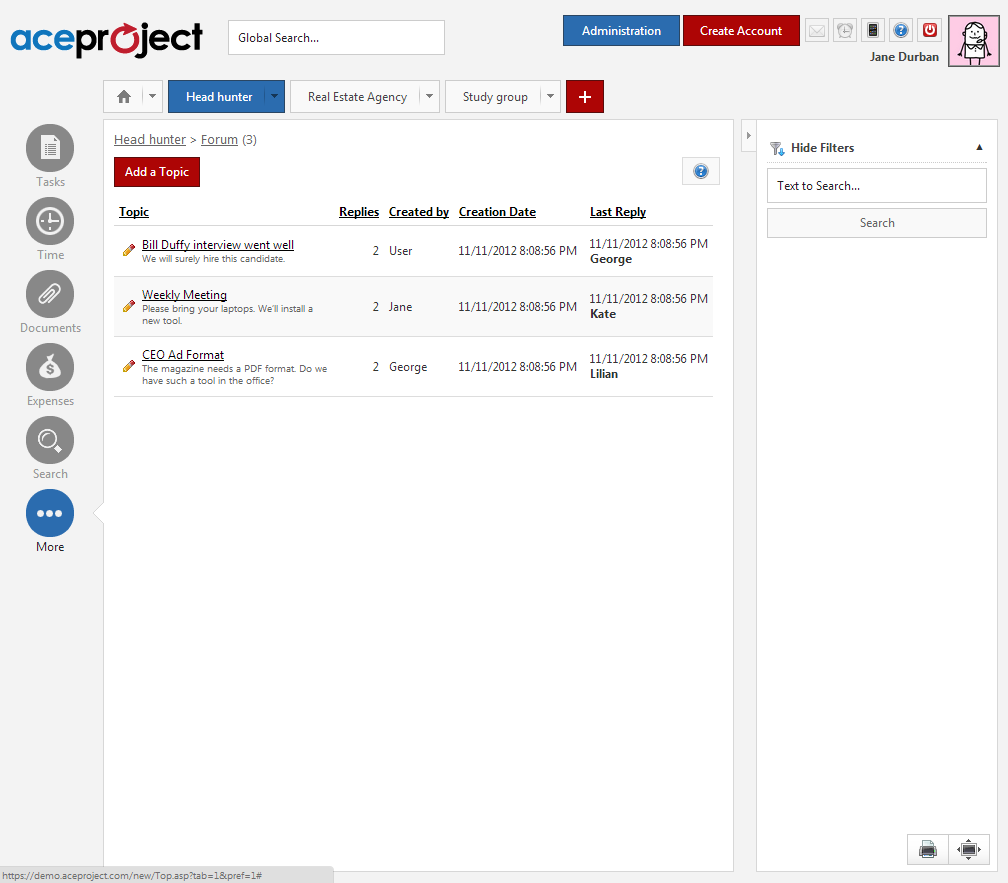
This messaging feature lets you exchange with other users in your account. You can use this tool to communicate quickly with all assigned users on a specific project, with all administrators or with selected users. By default, AceProject also sends an email notification to the selected recipients with the content of your message. This feature is available under Home => More > Mailbox.
Export Data
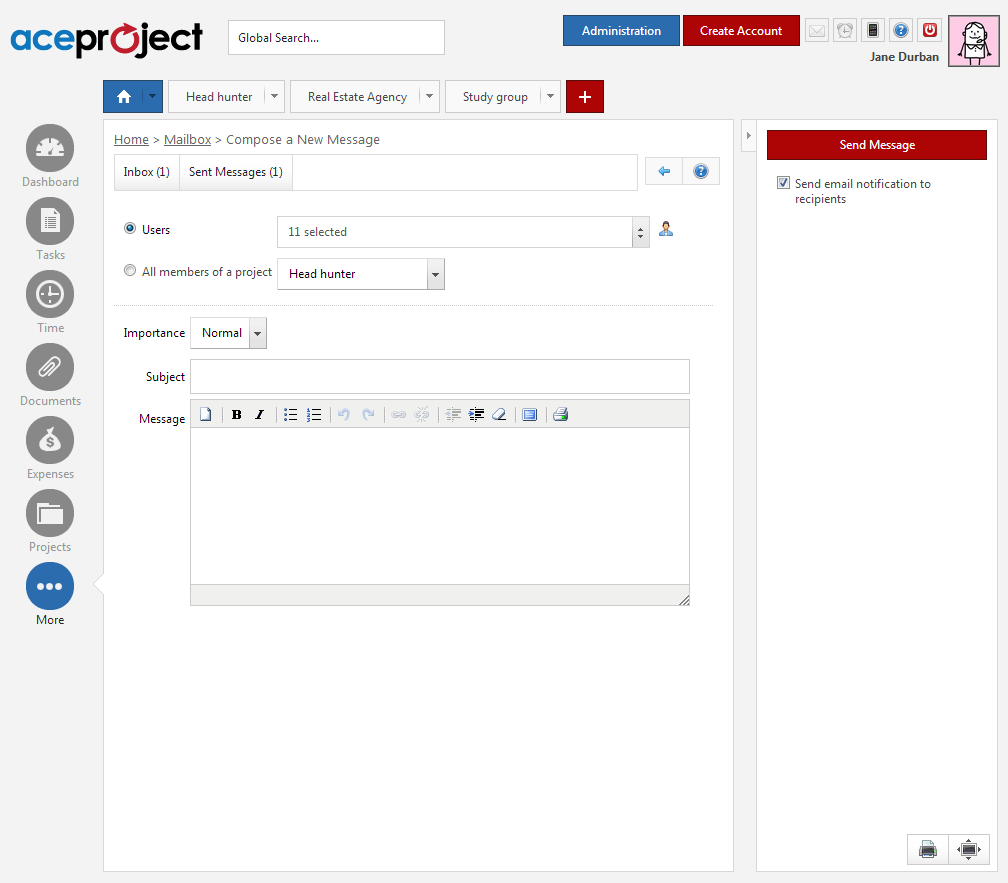
Users, projects, tasks and time sheets can be exported to Excel or in CSV format. Most reports are exportable as well. This feature is useful to archive data or to work offline on tasks for bulk task updates. To export data, click the “Export” Microsoft Excel icon near the upper right corner of the screen whenever you see it. AceProject also provides a “one-stop” export area under Administration => Tools> Export Data .
Import Data
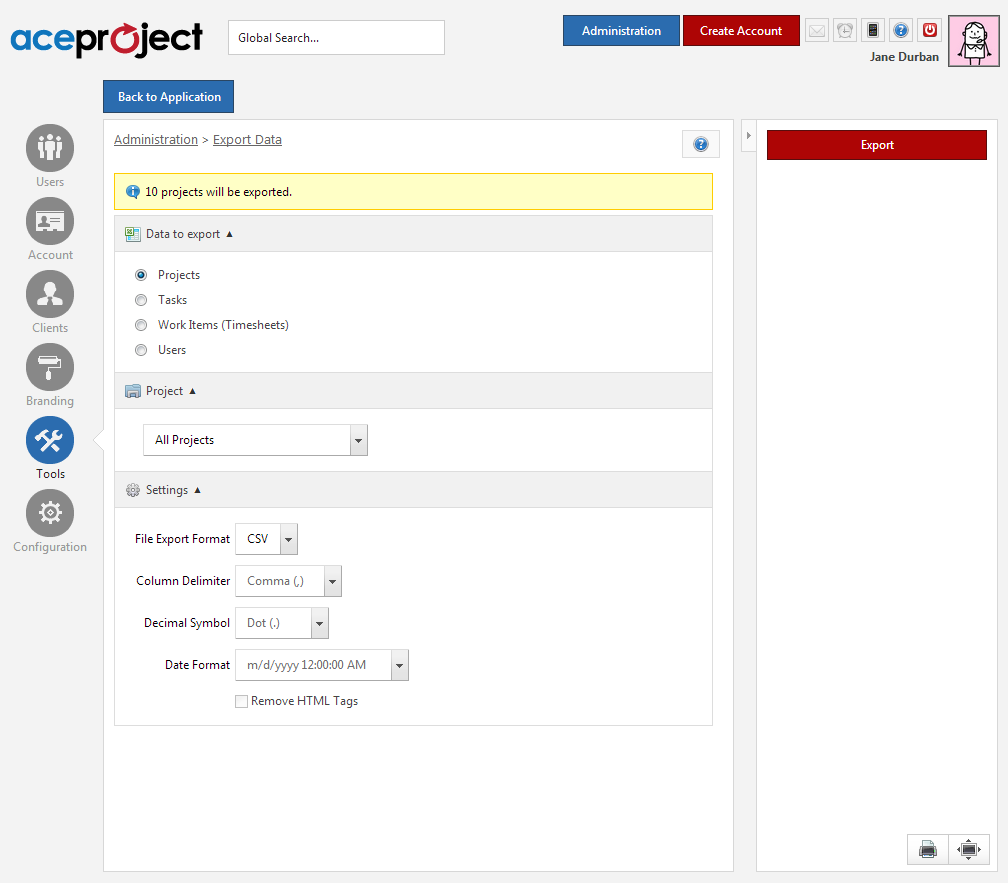
You can use this feature to update/create tasks or users in bulk. This can be a great timesaver if you have a lot of tasks or users to transfer into AceProject. This functionality is located under Administration => Tools> Import Data . Further details regarding data import in AceProject may be found in the following FAQs:
- How does the import feature work?
- Are there important things to know when importing users?
- Are there important things to know when importing tasks?
Task Views, Custom Task Reports, Calendars and Gantt Charts
In AceProject and task list pages, preconfigured views are available for convenient access to specific types of information on tasks (comments, financial info, time, dates, users involved). In these views, filters and a text search box are available in the right pane in order to refine the task list or help locate certain specific tasks. The “Custom View” allows you to configure your own view using the Show/Hide Columns (  icon) option.
For even further configuration flexibility, it is possible to create and save your own custom task reports. This functionality is available under Home => Tasks > Custom Task Reports . Custom task reports allow you not only to select the fields you wish to see displayed but they also provide the largest array of filtering options (a great number of fields to filter by and the ability to multi-select values in those filters). A text search box is also provided and the text search is applied to the task Number, Summary, Details and Comment fields. Additional information and tips for custom task reports are provided in the following FAQs:
- In AceProject custom task reports, do you need to select all items in a filter for AceProject to capture all tasks?
- Is it possible to have AceProject generate the current date dynamically in the date filters section of a custom task report?
Calendars display entries on the Estimated Start Date and Estimated End Date of each task. Each entry is also a link that opens the task in the Edit screen. When you hover your mouse over the link, further information on the task is provided on screen. Task calendars are available both under the project tab and under the Home tab, the latter being a cross-project task calendar.
Finally, Gantt charts show the progress of tasks or projects, in a timeline. Gantt charts also allow you to see dependencies that have been set between tasks. The project Gantt chart is located under the Home tab. Task Gantt charts are available both under the project tab and Home tab, the latter being a cross-project task Gantt chart.
Note that a Normal user’s project level access rights will determine whether or not the user may access these task views, reports, calendars and Gantt charts under the Project Tab.

